Wednesday, March 31, 2010

Serena and Bibin

The other weekend I printed some wedding invitations for the sister of one of my best friends. She probably hasn't sent the invitations out yet, so here is just a small sneak peak of them.

They were printed in 421U, a dove gray color, on bright white Savoy 100% cotton paper.

I just love the swash caps in their names.

Serena and Bibin1

Serena and Bibin2

Serena and Bibin3

Serena and Bibin4

Monday, March 29, 2010

Another dirt update

It was another weekend all about dirt.

I finished the last raised bed for the strawberries and planted all 75 plants. I almost finished with the double dig in one of the other raised beds, and I started clearing the gravel out of the walkways between beds. One day I'll line the walkways with landscape fabric and cover with mulch of some kind...

Strawberry beds

The husband was busy with his own dirt project. He finished the bottom level of the terrace by the creek and is almost finished with the top level.

Terrace1

Terrace2

The lower section is about 9 feet wide and 60 feet long. On Friday I got the results from the salt test of the soil, and the woman said the dirt is fantastic. She even sounded a little jealous...

Lower terrace

Because the dirt is so good, we'll plant the entire area with more raspberries and probably also some grapes.

The top level will still have a slight slope to it. I had hoped to put in enough railroad ties and dirt to bring it even with the level of the fruit trees on top, but we ran out of fill dirt. So in some areas it is almost level and in other areas it will have a slight slope. I'll plant it with day lilies, spring bulbs, and iris.

We had a very nice day on Sunday, and the snow in the mountains above us is starting to melt. The creek is slowly starting to rise...

Creek and lower terrace

It will be an interesting few weeks to see if and how much flooding we get this year!

Thursday, March 25, 2010

Dirt update

On Tuesday, the husband left for work at 5:30 AM. Some problems at work kept him there ALL night and he got home about 8 AM yesterday. He took a nap for about an hour or so and then spent the rest of the day working with our dirt.

What a trooper!

Here's how things look now. We have pretty much finished the bottom row of railroad ties (and by "we" I mean "he"). We need just one or two small pieces to finish off the end of the row at the edge of our property. Our neighbor behind us loves our progress. He says it looks like we're building a giant sea wall!

Railroad terrace3

Railroad terrace1a

Railroad terrace1

Railroad terrace2

Today I will be taking a sample of the soil from this area to my local extension office. They'll send it off for a full soil sample, but they can also test it in their office for salt. This area was overgrown with old tamarisk trees, also known as salt cedar, which our county doesn't allow at the compost facility because they throw off the salt levels in the compost they make. So I'm worried the soil will be too salty. Once I know the salt content we'll decide whether to move the good dirt to the bottom row or the top row, and make a final decision on what to plant in each place. We'll fill in the rest of the space with a giant pile of dirt we have left from digging the leach fields for the new septic system last year. 

Hopefully this weekend we'll be able to get the next load of railroad ties and be able to complete this project. I'm pretty excited about finishing this project for obvious reasons, but also because it means we get to start on the next big project, which has me super excited! I'll give you a hint: It involves a phenomenal new space for outdoor living AND a new studio space where all my letterpress things can live together. Yay! 

Wednesday, March 24, 2010

Studio update

My little studio space continues to waffle between chaos and order, but the other day we took one more orderly step forward.

A while back I bought three super cheap ($20 each) black bookcases from Wal-Mart and arranged them in a U-shape against the wall. It most certainly is not my ideal storage solution, but that gorgeous antique wood flat file or bookcase continues to elude me.

The husband took a scrap piece of plywood and cut it to my specifications, and I stained it, gave it a quick coat of polyurethane, and plopped it on top of the bookcases to create a workspace.

studio 003

I finally found my old sugar mould that I bought years ago in Frederick, Maryland, and I filled it with all my colored markers, rulers, scissors, etc. It makes me happy (SO happy!) to have them so organized.

studio 004

I also finally organized the area under my small paper cutter, arranging the pantone inks by color so I can find the darn things, and placing labels on the small cans of ink that I mixed by hand.

Studio 4

Let's hear three cheers for being more organized!!

Tuesday, March 23, 2010

A day in the sun

After a very long weekend working on a set of wedding invitations, I spent most of yesterday outside working on the garden.

The weather was amazing, so I brought all the girls outside with me. The husband helped me build a very small temporary pen by our workshop so that I can let them come outside for a bit when the weather is nice. The sides are almost 4 feet high and I found out yesterday that we'll need higher sides soon. The girls love testing their new wings, and Harriet made it up in the air to within 6 inches of the top of the fence! Hazel spent most of her time walking around looking up in the air, trying to figure out just how hard she'll have to flap her wings to make it over the top...

It's a little hard to tell from the photo, but the girls have nearly tripled in size and have lots of feathers now. They have the cutest tails that stick up in the air now!

Baby chickens soaking up the sun

True to her genetics as a pointer, Sadie pointed the way to the baby chickens. This series of photos was taken over the course of almost 2 minutes. She'd hold each pose for at least 30-45 seconds!

Sadie points the way to the chicks1

Sadie points the way to the chicks2

Sadie points the way to the chicks3

That last photo cracks me up. Sadie was in the process of taking a step forward when one of the chicks started hassling another chick (they do that alot!). She froze in place, with that hind leg in mid air, and stood there for at least 30 seconds. She may have stood there even longer if I hadn't started laughing and distracted her!

Friday, March 19, 2010

Moving dirt

These days, it seems like I just move dirt from one place to another, and then back again.

I'm currently working on the "double dig" in my raised beds. Last year we bought a truckload of good dirt and compost. We built six raised beds that had to be placed over the top of an area that was quite compacted from years of parked cars, and it was as hard as concrete. There were several options for how to proceed, and I of course chose the one that would mean the most work for me in the end: Because I was so busy with the house remodel and had very little time, I put the raised beds over the compacted dirt, filled them with good dirt and compost, and hoped for the best, knowing in my heart what it would mean for this year...

So now I have to suck it up and go one bed at a time, removing the dirt I added last year and digging down as far as I can into the original dirt to break it up and loosen it. This job is made a little easier this time of year because the ground is still wet, but it is still hard, hard work.

Here I've loosened about 12 inches of dirt and pulled out some enormous rock-hard dirt clods. Each small section I do gets a load of compost (that we bought from our county compost facility. Two cubic yards for $35!).

Raised beds7

I worked the compost into that part of the soil and then spent another hour or so breaking apart those giant dirt clods and placing that dirt on top, to which I'll add another load of compost.

Raised beds8

So far I have completed one bed, on the left. I'll be using the square foot method of gardening; because the beds have odd angles (the husband hates symmetry!), I laid out a grid using twine to help me plan where the different vegetables will go.

Raised beds1

I am also building three new beds this year where my three new varieties of strawberries will go. (The husband was so dismayed by the perfect rectangular shape that he couldn't get very excited about my skills with the chopsaw and drill...)

Raised beds3

While I've been busy on the garden area, the husband is working on the waterfront section of our property... We have an area behind our house with a creek. It's usually a very small creek, but when the snow melts in the mountains above us or there is a big thunderstorm, it becomes a very big creek.

Creek area2

This whole area of our property used to be completely covered in horrible tamarisk and elm trees that extended from the creek area about 20-30 feet up toward the house. It has taken three years to remove all of it. This is how the area looked in August, 2007. From our house, you couldn't see either of the neighbors' houses behind us.

Original creek area

We had a lot of rock left over from the new septic system we put in last year, so we are placing the rock along the edge of the creek to help prevent any further erosion of this area.

 Creek area6

The property slopes down to the creek over a long distance, which makes it very hard to use that land.

Creek area1

So we are also moving that dirt out of the way for now so that we can place some railroad ties and large rocks to create two new level planting areas for flowers (probably all the day lilies and iris I stole from my mom) and more raspberries and/or grapes.

Creek area3

The progress is slow but steady!

Thursday, March 18, 2010

Miniature wildflower iris

Last fall I planted a bunch of wildflower bulbs. Yesterday I was cleaning out the raised bed at the front of our property and discovered some things that made me very happy: lots of tiny (3 inches!) iris in three shades of purple and yellow.

I also planted some miniature iris that are white and yellow, along with about 10 other kinds of bulbs (I went a little crazy...) of varying heights that will be blooming from now through early summer. Yay for early spring color!

Wildflower bulbs 001

Wildflower bulbs 002

Wildflower bulbs 006

Wildflower bulbs 005

Wildflower bulbs 003

Wednesday, March 17, 2010

The IQ of a baby chicken

I've been digging in the garden recently and have uncovered some grubs. Do you know how much baby chickens like grubs? They like them a lot!


The sad thing is that Harriet (the black one) figured out almost immediately that grubs are good and that grubs come to her on a paper plate, and so when the paper plate enters the box be ready to grab a grub. Hazel (the white one) was about a day behind Harriet in discovering this for herself. But I first started feeding them small grubs about five or six days ago, and Greta (the gray one, my favorite one) STILL doesn't get it. She has only managed to get two grubs that she stole out of her sister's beaks. Despite my best efforts to keep Harriet and Hazel away and let Greta look at the grubs on the paper plate, she just doesn't understand the concept yet.

Not long after I introduced them to fine dining on grubs, I added a small perch to their box. Hazel jumped on it right away, and Harriet was right behind her. But it's been about four days since the addition of the perch, and Greta still hasn't jumped on it that I've seen.

I hate to say it, but I think Greta might be stupid!

Tuesday, March 16, 2010

Where are the baby chickens?

Sadie knows where they are.


On a totally unrelated note, you can see from the video that we still have sections of the floor that aren't tiled. After many months (EIGHT months, to be exact), I think we finally have a solution to the problem we encountered with the defective sealer on the last pallet of tile. We can't get any more tile to replace the defective ones, but we have tried a new sealer for the past month or so that seems to work well. So as soon as the weather warms up just a bit, we can get back to tiling and will finish the floors. Yay!

Monday, March 15, 2010

Gardening 101: Soil preparation

So you started some seedlings and you have a big pile of beautiful compost. Now what? It's time to prepare your soil.

Soil preparation is key for maximum production in your vegetable garden, as well as healthy lawns and other plants. As I learned from my Soil Preparation class offered by my local CSU extension agent, there are four main areas to focus on to achieve great soil: 1) organic content, 2) low salts, 3) deeply prepared soil, and 4) adequate nutrients.

1. Organic content
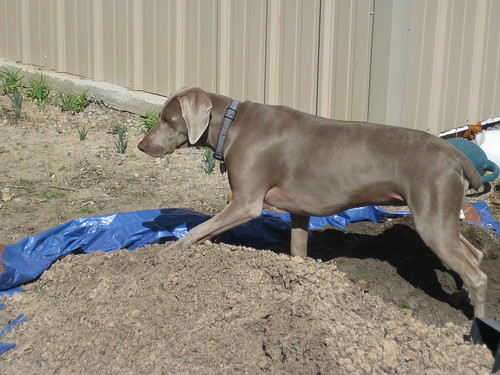
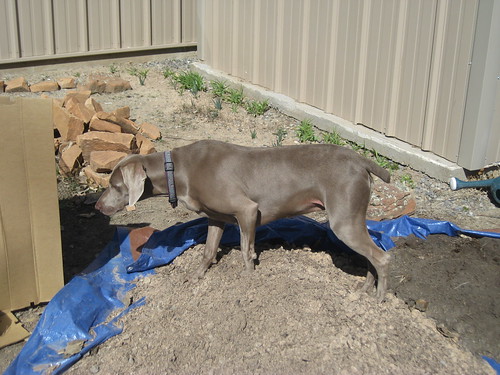
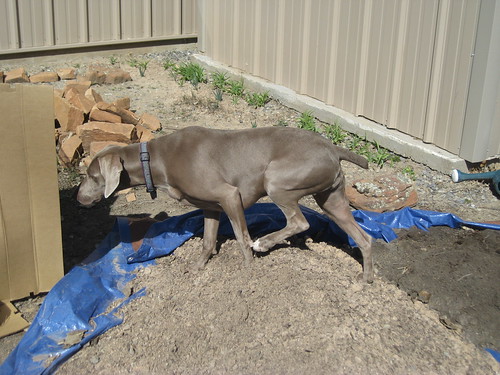
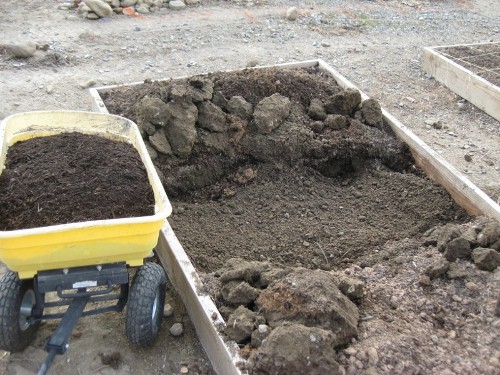
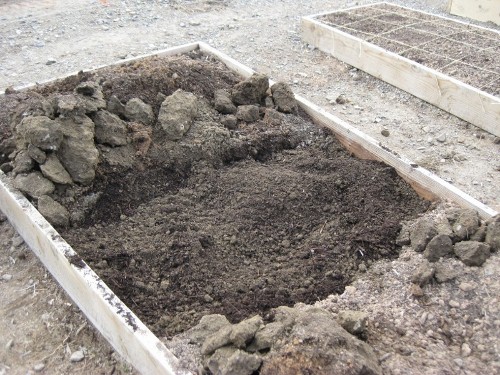
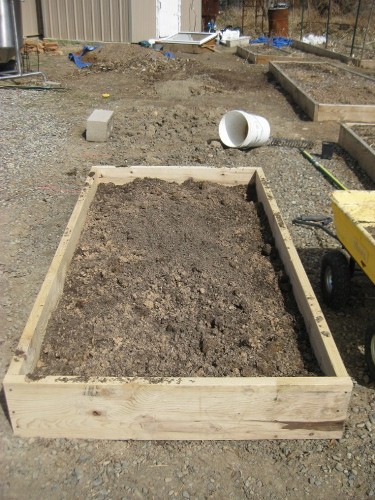
The compost that you created or bought is the star of the show here. The ideal soil will contain at least 5% organic matter (compost), 45% minerals (via the sand, silt, and clay that make up your soil), 25% water, and 25% air. Here's an interesting thing I learned. I always imagined the ideal soil as being very fine, with no lumps or clods or rocks of any kind. I was wrong! You actually do want clods of soil about 1" in diameter as a minimum. You also want some larger pieces of organic material; this is important for keeping the pores of the soil open to allow for adequate air and water, and to ensure good drainage. The roots and microbes in the ground use oxygen and create carbon dioxide, so the soil particles must be kept separate to allow for the exchange of these gases.

If you have clay soil, prepare the dirt as deep as you can and add coarse organic matter as deep as possible. Ideally you will "double dig" or even "triple dig" your soil: Remove the top 12" of soil, loosen the next 12" of soil (and the next 12" beyond that if doing a triple dig), and mix in coarse organic matter. Add back the 12" of soil you removed, and mix more organic matter into it. For this soil type, the organic matter will improve movement of oxygen and carbon dioxide through the soil and improve movement of water into and through the soil.

If you have sandy soil, adding organic matter will improve the soil's ability to hold water and will improve the nutrients available for your plants.

When adding organic matter, add at least 2 inches of compost (6 cubic yards for a 1,000 square foot area) and mix into the soil. If you add more organic matter (3 to 5 inches would be awesome in most cases), do it in 2-inch increments so that you're able to mix it well.

I had a question from Sandy C in Michigan (hi, Sandy!) about what to do for a lawn struggling to survive in a horrible clay soil. She wondered if the good Dr. Swift from my extension office had any pearls of wisdom for this predicament. Indeed, he did! (But I'm not sure you're going to like the answer...). The key in this situation is to amend your soil to improve movement of water and oxygen. In this case, you must aerate the lawn. Depending on the size of your lawn, you may want to rent a heavy-duty gizmo like this one that I found online for rental at Home Depot stores.


Once you've aerated your lawn, cover it with coarse organic matter and then spend the rest of the day (or weekend?) raking the compost around your lawn in an effort to work as much of it as possible down into the holes you've just created in your soil. The key here is to use organic matter that is as coarse as possible for the size holes you just created so that you can hold open the soil to allow movement of water and oxygen/carbon dioxide. Whatever you do, don't use a fine material, because this won't hold the soil open. Dr. Swift recommended doing this process twice a year every year for a healthy lawn.

And here's an interesting bit of crucial information: If you have a clay soil, the thought may have occurred to you that you can add some sand to improve drainage. Get that thought out of your head!

Clay plus sand equals cement.

Enough said.

2. Low salts
A high salt content in your soil is sad news for your vegetables. Most vegetables will perform poorly or not at all in soil that is high in salt. My particular area of the valley has pretty good dirt, but just a few miles away it is very high in salt. In many places the salt comes to the surface and the ground will be so white that it looks like it snowed in June! The best way to determine the salt content of your soil is to have it tested. If you have a local extension office, they might offer this service (perhaps even for free, as my local office does). If you don't have a local extension office, you can try a home test kit available at your local nursery. Better yet, you can send a sample of your soil to a testing service such as Ward Laboratories, which will not only tell you your salt level, but also the exact nutrient composition of your soil so that you can fertilize appropriately.

If your soil is low in salt, you scored. If your soil is high in salt, the only thing you can do is amend, amend, and amend your soil again by adding organic matter. Even if you build raised beds and bring in good soil, you will still have to do considerable work to create a barrier between the new, good soil and the old, high salt soil. In this case, Dr. Swift recommended a layer of a fabric weed barrier, a layer of gravel, and then another layer of fabric weed barrier between the two types of soil to prevent the salts below from leeching up into the good soil.

3. Deeply prepared soil
Your soil should be prepared as deep as possible, but at least 6 to 8 inches deep for most vegetables, and 12 to 18 inches deep for vegetables such as carrots, parsnips, and potatoes. A general rule of thumb is to prepare your soil to twice the depth of the root system of the plant you'll grow; the deeper the soil is prepared, the healthier the plant. As I mentioned above in the section on adding organic matter, if you are really gung-ho about having great soil, you can embark on the journey known as a double dig (or a triple dig if you've got your game on).

This link provides a good description of the double-dig process:


4. Adequate nutrients
Plants need the right macronutrients and micronutrients for their best growth.

Macronutrients:
Nitrogen
Phosphorus
Potassium
Calcium
Sulfur

Micronutrients:
Iron
Copper
Manganese
Zinc

Before you plant anything, it is a very good idea to get a complete soil sample (see link above for Ward laboratories) so you'll know exactly what nutrients you need to add for the plants you intend to grow. You'll need to fertilize not only based on the nutrient composition of your soil, but also on the types of plants you'll grow, because different plants have different needs.

For example, if you're growing potatoes, during the tuber bulking stage, you'll need to fertilize with one half to two thirds of a pound of nitrogen every 10-14 days per 1,000 square feet. If you're growing sweet corn, you'll need about one and a half pounds of nitrogen per 100 feet row.

When fertilizing, add by "side dressing," in which you place the fertilizer about 2 inches away from the stalk of the plant. In some cases you'll need to mix the fertilizer into the soil and then water. Follow the directions for the specific product you'll use.

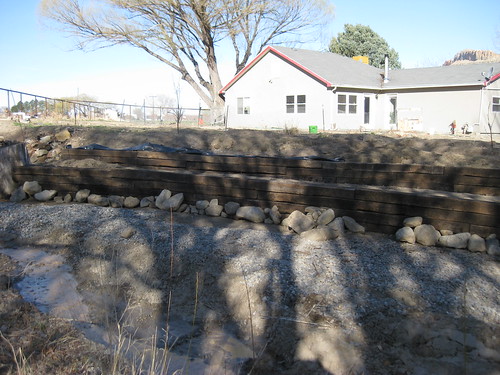
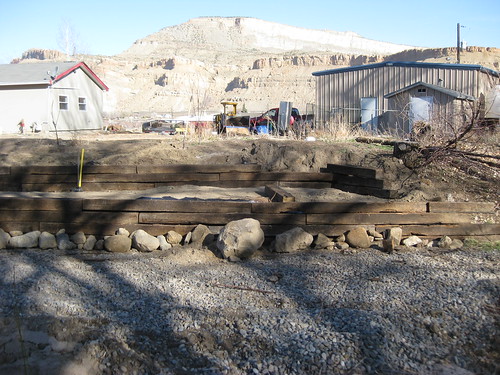
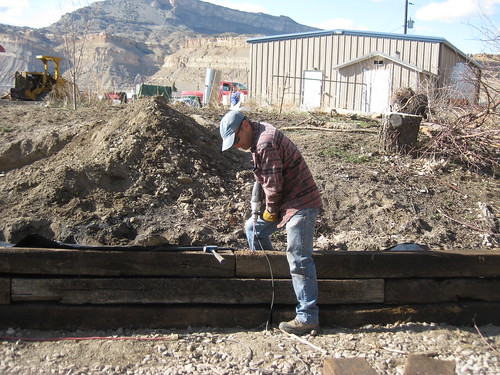
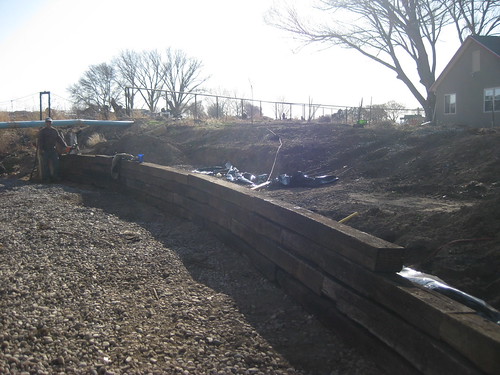
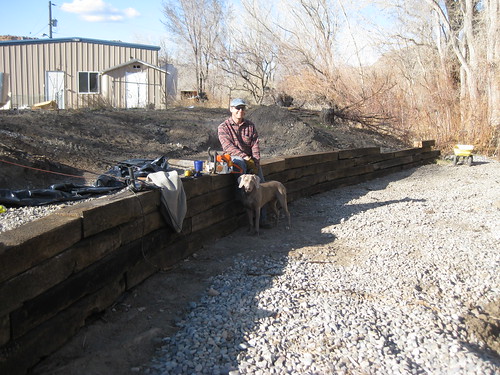
I hope you've gotten some useful bits of information about preparing your soil. And just so you know that I'm practicing what I preach, in the next few days I'll provide photographic documentation of my own journey into the mysterious world of soil preparation!

Friday, March 12, 2010

Eggshell seed pots

How is the green-thumb crowd doing out there? Has anyone started any seeds yet?

If you'd like to start some seeds but you've used up your supply of toilet paper/paper towel rolls and newspaper to make these seed pots, I have a solution for you. Use eggshells!

1. Start by saving all your eggshells whenever you cook with eggs. You can either crack them in half to get two shells or, like I did, remove just the top portion of the eggshell so that you have a deeper "container" for your seed. Rinse them out and let them air dry.

If you just cut the tops of the shells off, be sure to save them. They can either be ground up and added to the compost pile, or they can be broken into pieces and placed on the ground around the plant once it's in the garden. They add a little layer of protection--an eggshell moat of sorts--because many bugs don't like to climb over the sharp pieces. 

Eggshell seedlings (3)

2. Poke a hole in the bottom of the shell for drainage. Because moisture won't evaporate as quickly as it will with the paper seed pots, it's important to provide drainage. After experimenting with several options, I found that the easiest thing is to set the eggshell bottom down on a folded towel (or anything soft), and then use the tip of a ball-point pen to poke a hole through the bottom of the eggshell. Using this method I didn't crack a single shell.

Eggshell seedlings (7)

3. At this point you can either write the name of the seed directly onto the shell, or you can supersize it by dying the eggshell! I wanted red shells for my tomatoes, green shells for my basil and other herbs, and blue shells for some flower seeds.

I got an old coffee cup, added about 1 tablespoon of vinegar and about 20 drops of either red, green, or blue food coloring, and then filled the cup up with warm water. Then just dunk your shells into the cup. Leave the shells in the solution until they are as dark as you want. (Note: If you dye your shells, be careful about letting them sit in water after you've planted seeds, because the color may run a little bit.)

Eggshell seedlings (8)

4. Remove the shell from the cup using a fork or a slotted spoon, and turn upside down on a paper towel to dry. 

IMG_6896

5. Label the shells (I found that it was easiest to lay the shell on its side and rest my arm on our 2-inch thick cutting board so that I could write clearly without putting pressure on the shell), fill with pre-moistened seed starting mix, and add your seed.

004

6. I didn't have an extra egg carton handy, so I filled a small baking dish with gravel (you could also use sand or dry rice) and nestled the shells down into the gravel so that they would stand upright.

002

Now sit back and let Nature do her thing. And if you start now, you can have some nice little eggshell seedlings in time to give as sugar-free gifts for Easter!

One very nice thing about the eggshells is that they don't dry out as quickly as the paper pots. I check on them every day but usually only need to water them every other day, versus sometimes twice a day for the paper pots. The downside is that they are a little bit fragile! Just be careful when you pick them up or move them. But even if they get small cracks in them, they should still last until you're ready to transplant your seedling into a larger pot. 

Coming up next week, I'll have part 2 of Composting 101: Soil Preparation, including some information on lawns for Sandy C!

Wednesday, March 10, 2010

A breath of fresh air

Thank goodness we have some fairly warm days ahead in the weather forecast. This house could really use a breath of fresh air, and I can't wait to open up all the windows and get some clean spring air in here.

This time of year I think all houses start to get a bit of a funk about them after being closed up all winter. But when you add a flock of chickens to the mix, things get pretty funkified! I finally had to move the girls to our bathroom so that I could close the door and leave the exhaust fan running. Now when I ask Sadie, "Where are the baby chicks?" she goes roaring back to our bathroom and bonks her nose on the door!

I've always loved the idea of a house with a huge wall of glass that can be opened on a nice spring day to let the outdoors in. This house by Thomas de Cruz Architects and Designers, found via Good Measure, hits the nail on the head, I think!

dairy1

dairy2

dairy4

dairy3

Tuesday, March 9, 2010

Meet Greta, Harriet, and Hazel

I don't care what the calendar says. It's officially spring at my house, because over the weekend I got three chicks!!

This is Greta. She is the exact color of a mouse.

Greta

I think she's my favorite so far.

Greta 2

And this is Harriet. Every time I pick her up and stroke the top of her head, she closes her eyes and stops wiggling.

Harriet 2

She's a glossy black with a small spot of white on her chest.

Harriet

And this is Hazel. I couldn't put her down for the picture because she's a runner!

Hazel

I love the few black freckles on her back.

Hazel 2

All three chicks are Whiting Blues, a locally raised form of the breed known as Americanas. The neat part? Each chick will lay about 300 eggs a year. The great part? They love bugs. I can't wait to turn them loose on the vermin in my garden this year! And the fun part? They lay BLUE eggs!! The rumor is that the feed store where I got them will also soon have Whiting Greens, which lay GREEN eggs. I only wanted three chicks, but if they happen to have a Whiting Green next time I'm there, I may have to add another one to my flock.

I'm really excited to have them. It took a full year to convince the husband that we needed to have a few hens. But do you know who is even more excited to see them?

Sadie.

Sadie and the chicks2

They currently live in a box with a heat lamp in my studio. I have to keep the door closed. If I walk toward the door, Sadie is right beside me. She can't wait to see the chicks. She peers into the box with the most intense stare possible for a dog.

Sadie and the chicks

I handle each chick a few times a day so that they'll be used to people. I pull each chick up out of the box and stroke her head. Before long, Sadie starts shaking. I'm sure that she thinks she's looking at the best squeaky toy, ever. So far she's been pretty good, but she did lick the head of one of the chicks I was holding! Of course, I keep a close eye on her and make sure the door is always closed.

The other night I woke up and Sadie wasn't in her bed. I turned on the light and looked out in the living room and found Sadie standing with her nose touching the door, no doubt giving it a push every now and then just to see if the door knob was really latched...

LinkWithin


The Handwork Chronicles | Template By Rockaboo Designs | 2012